You know how you always finish all the dates in the house before the end of Ramadan? Yeah, me neither, dates seem to always be in oversupply, not that I’m complaining. Especially if it means you can use them all up to make this delicious Date Palm Cake.
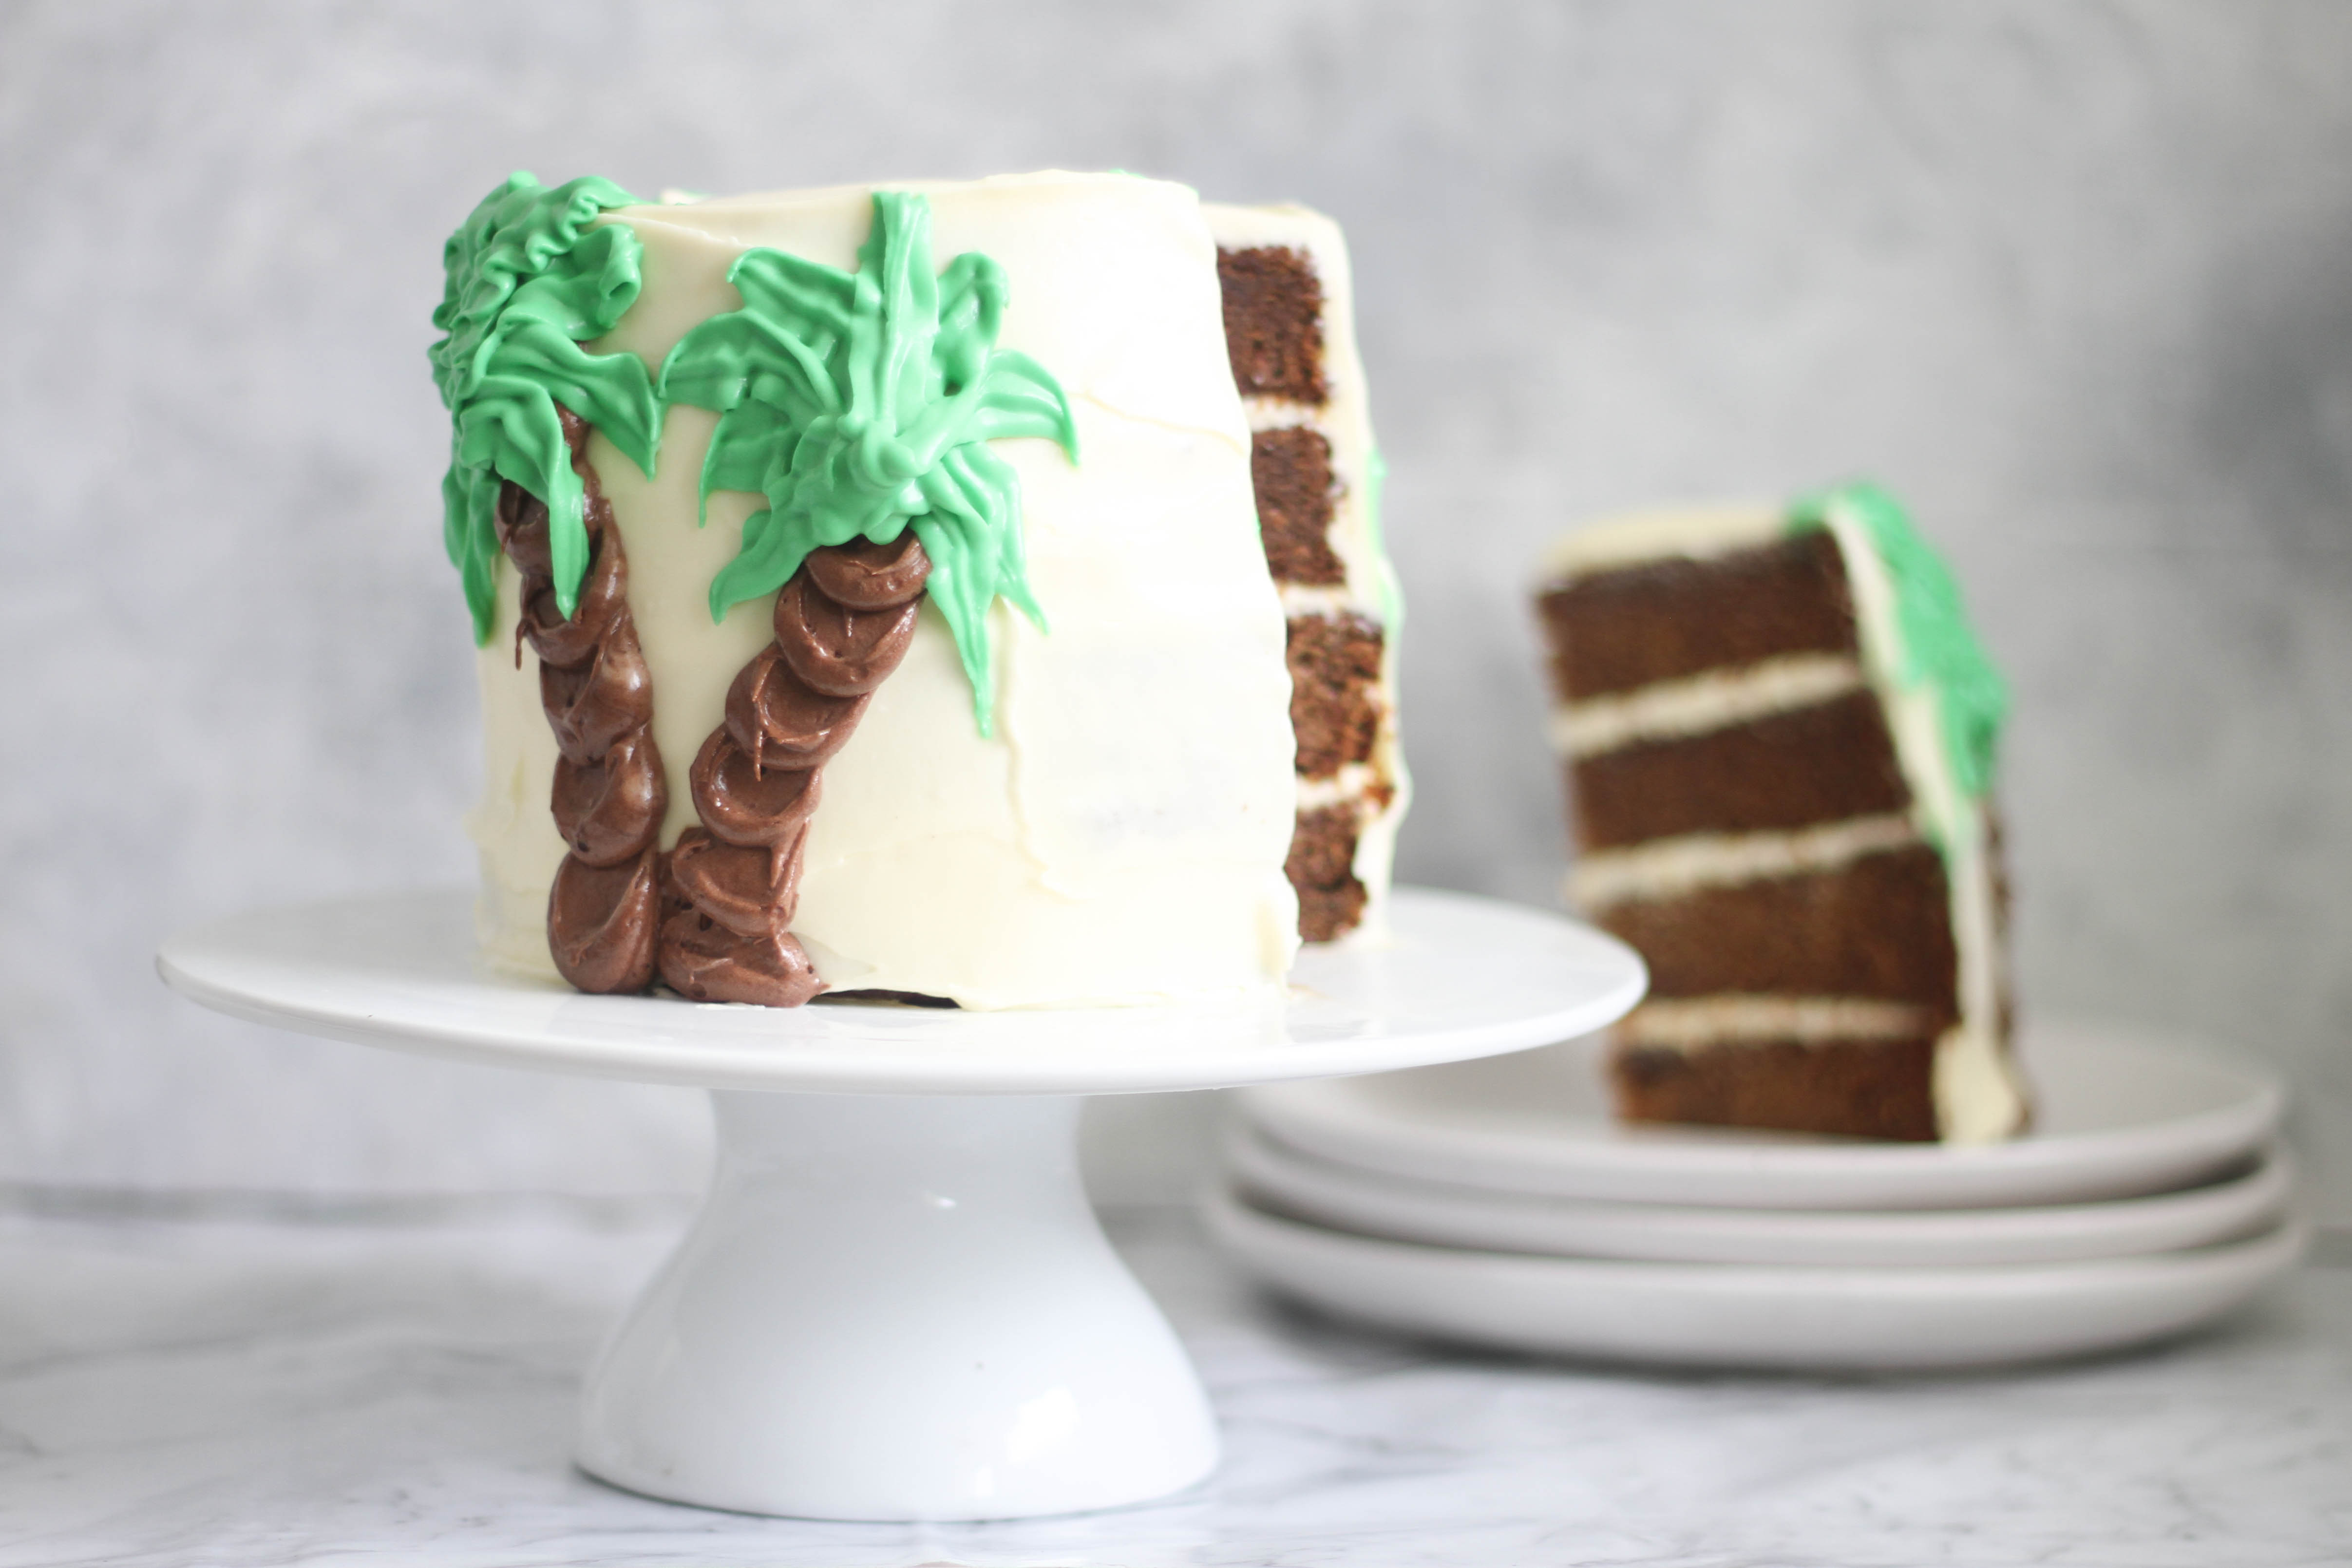
Date cake is one of my favourite recipes, in fact I made date cake as Eid gifts one year and even used the recipe for date muffins for Eid breakfast. This recipe is a winner! It’s rich in flavour, moist and totally decadent. Perfect for an Eid dessert or any day of the week. Plus it’s all covered in cream cheese frosting taking the decadence to another level.
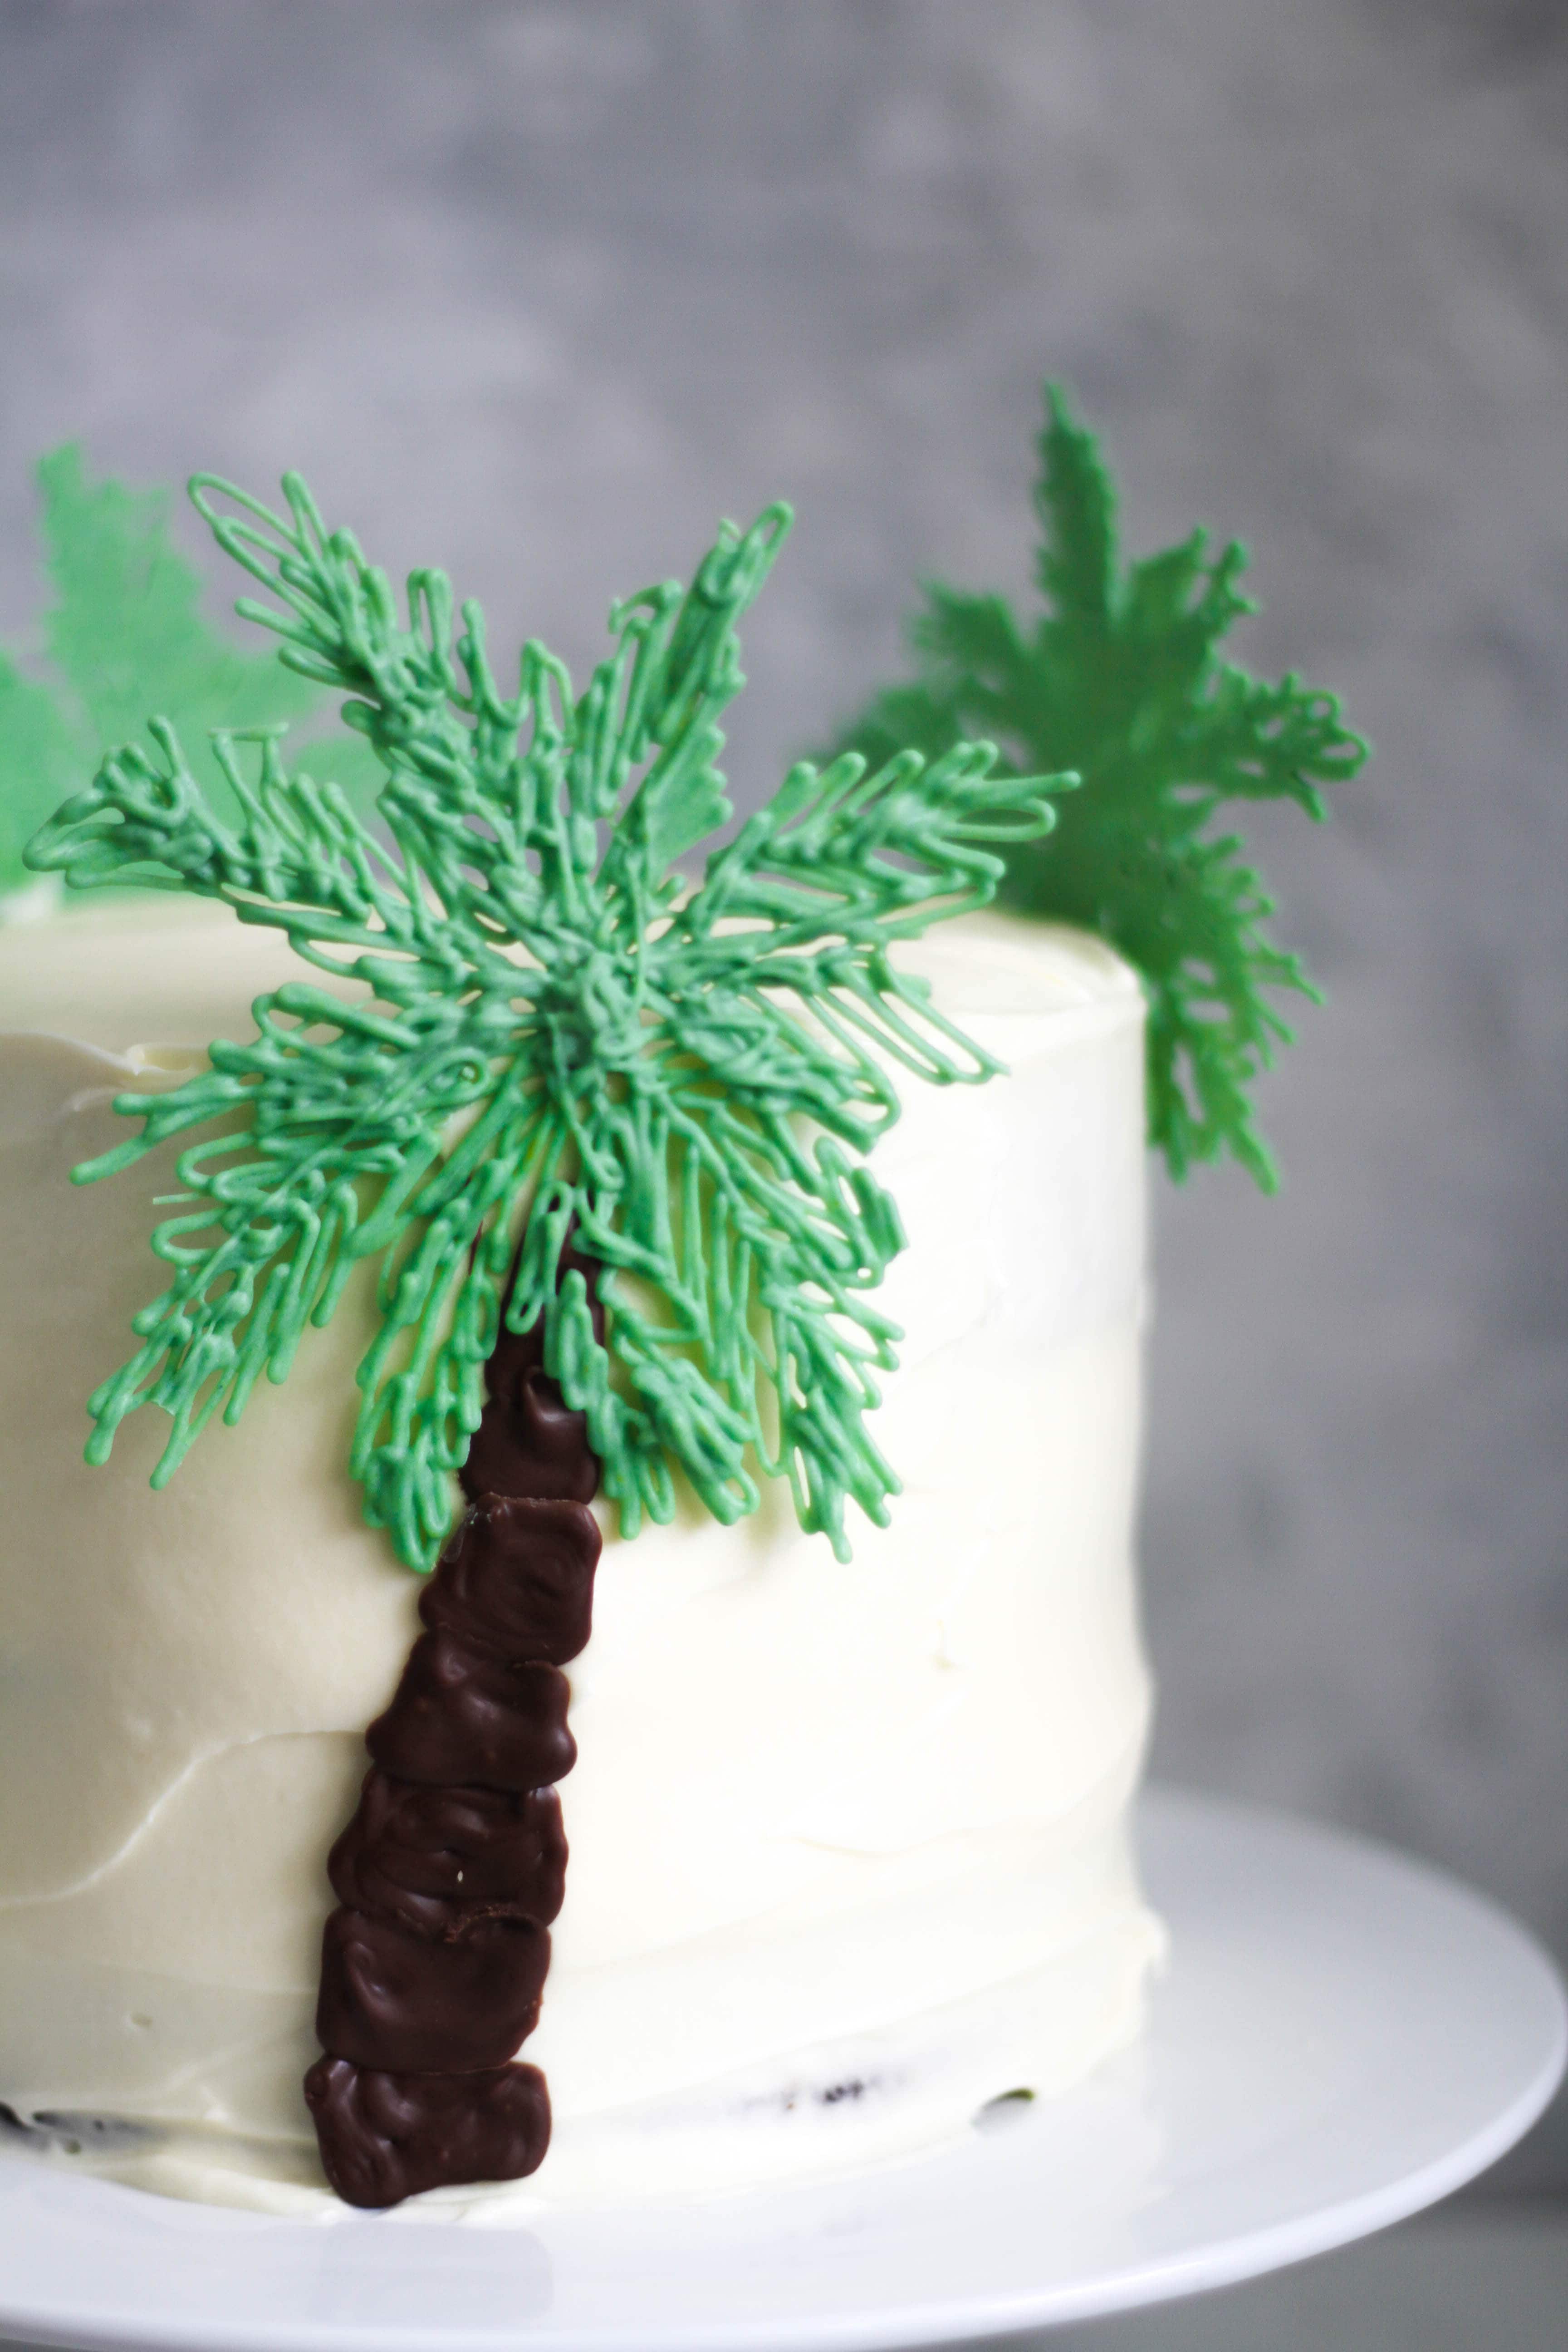
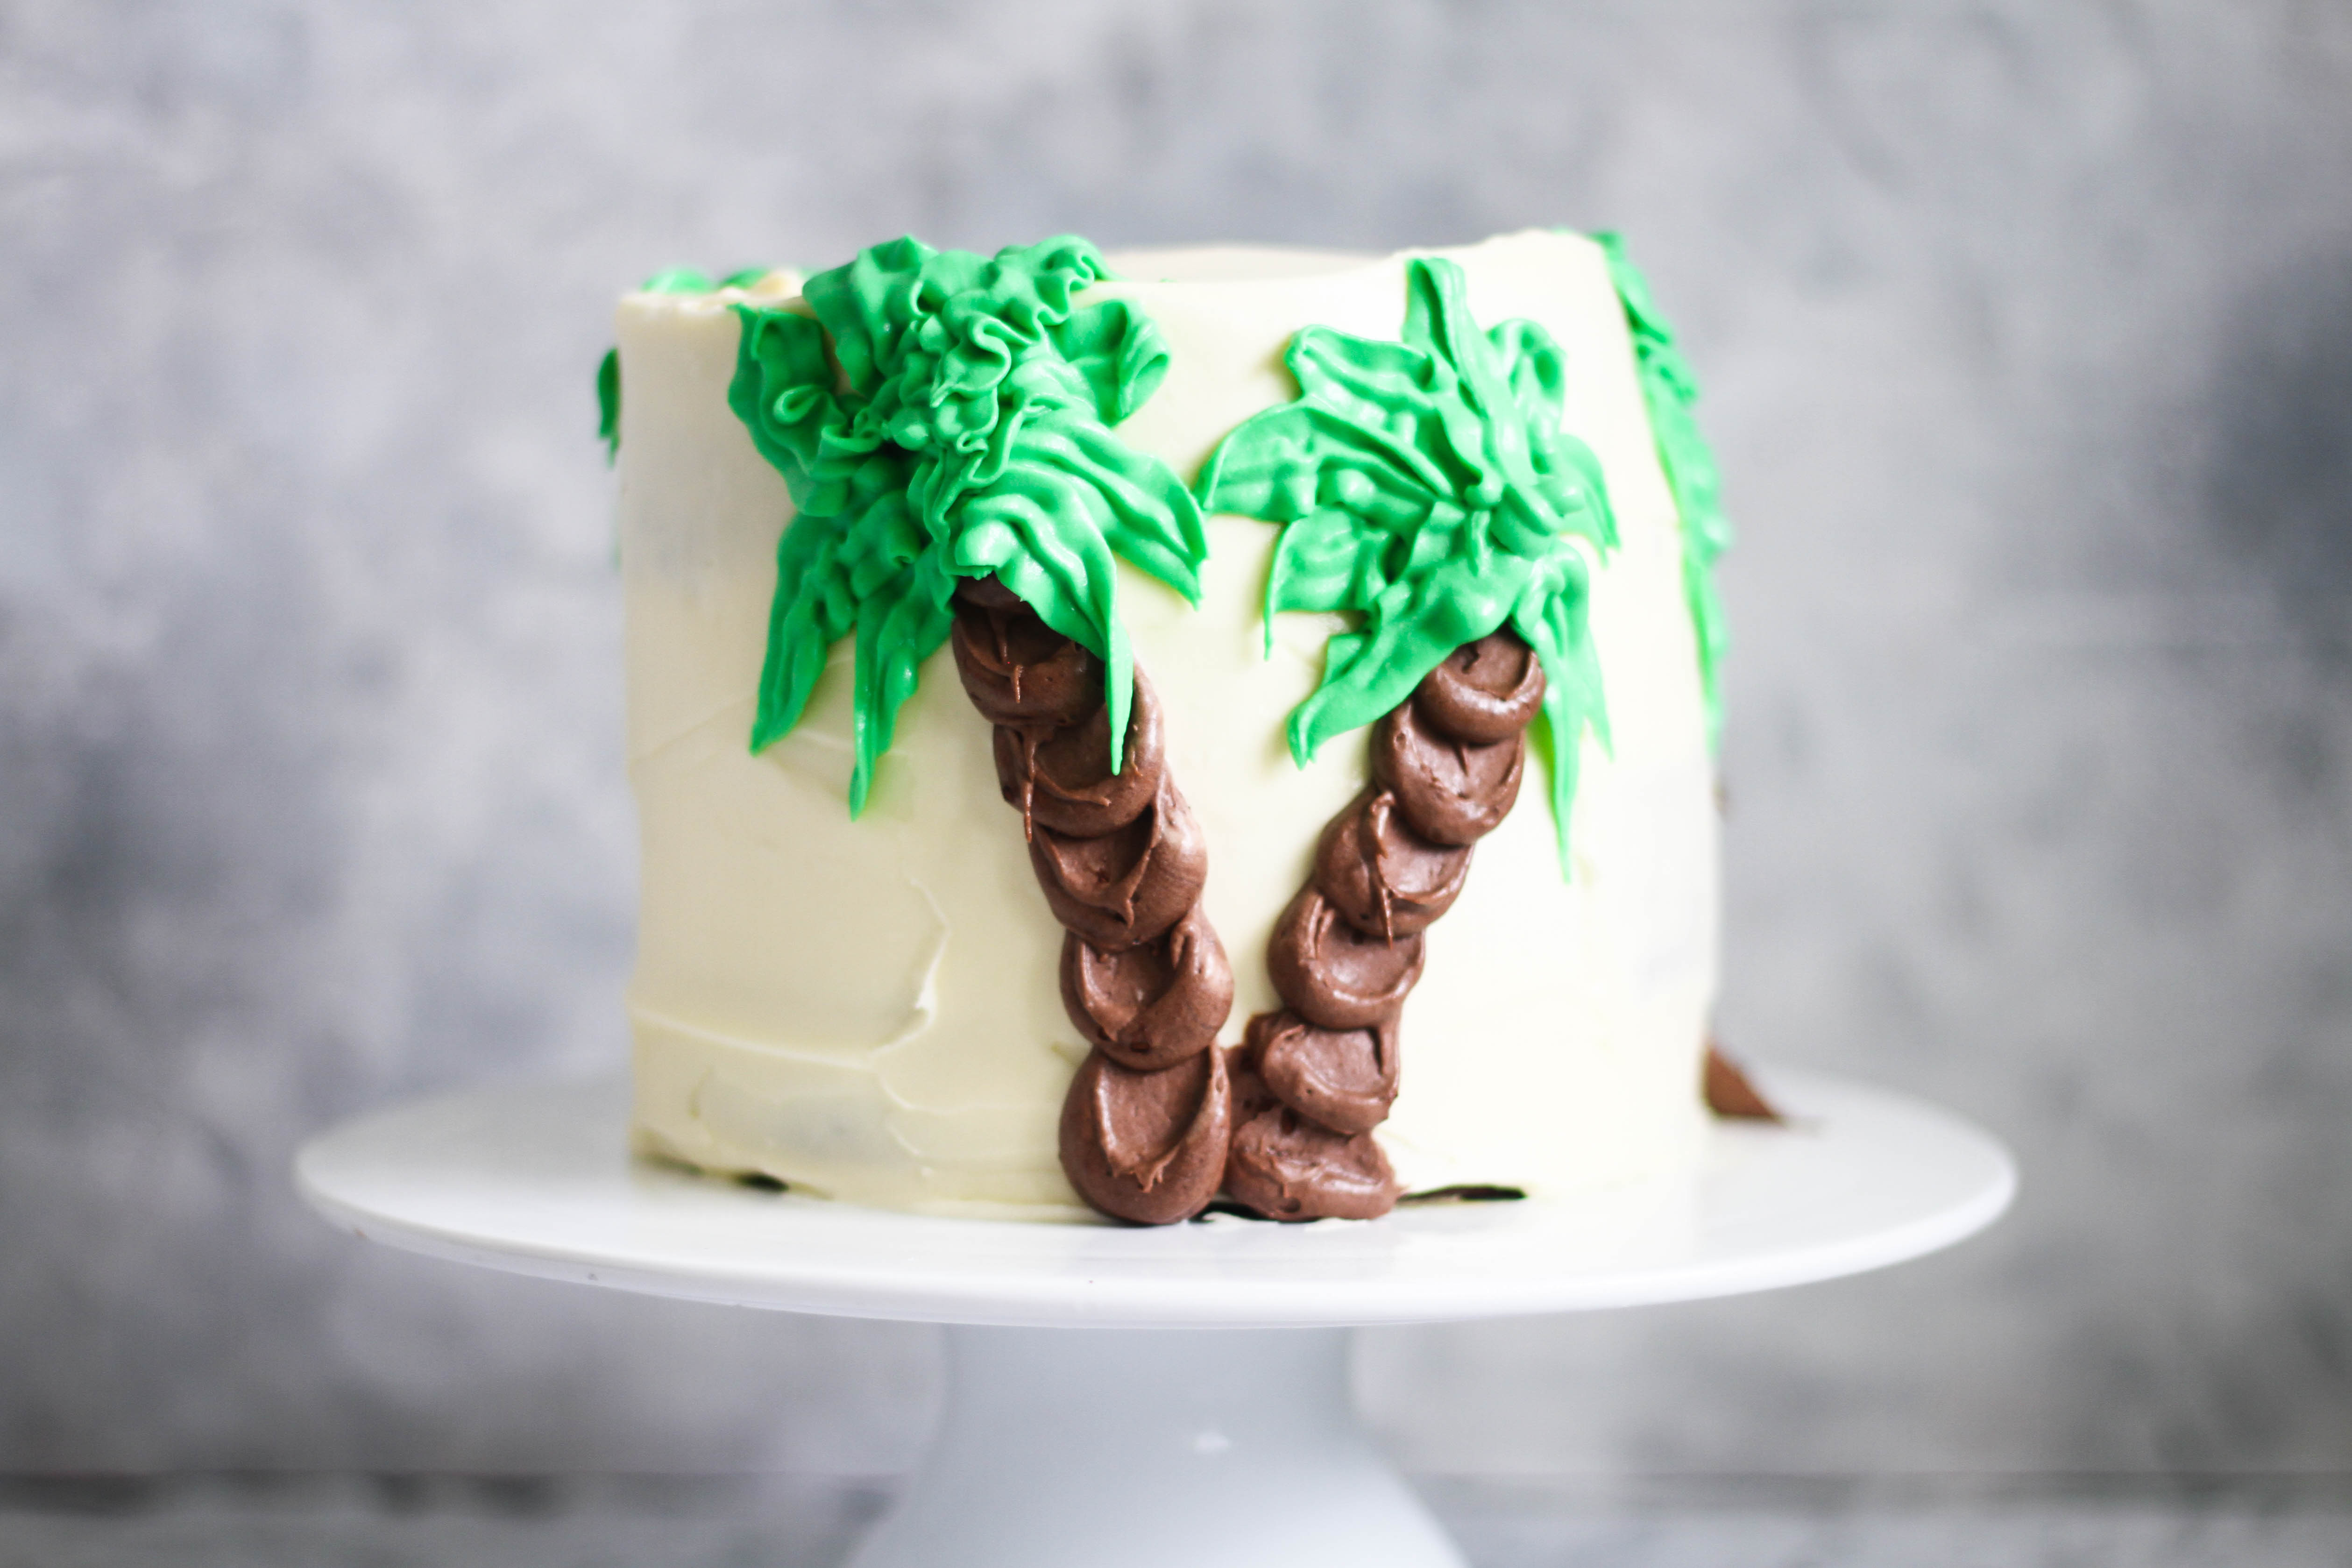
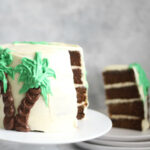
To top it off, I wanted to create these date palm decorations to really make it pop. I made the decorations 2 ways, one with compound white chocolate coloured green and the other with cream cheese frosting coloured green and flavoured with chocolate. I made a Palm Tree Template printable so it’s easy to get the right shape, just put it under some baking paper and pipe away (instructions and video coming soon).
I think I prefer the cream cheese one, how about you? Hop over to Instagram and let me know which Date Palm Cake is your favourite.
Date Palm Cake
Ingredients
- 2 1/4 cups roughly chopped pitted dates
- 1 1/2 cups boiling water
- 1 1/2 tsp bicarb soda
- 150 g softened butter
- 1 cup brown sugar
- 3 eggs - room temperature
- ¼ tsp vanilla
- 1 1/2 cups self-raising flour
Cream Cheese Frosting
- 125 g softened unsalted butter
- 500 g softened cream cheese
- 1 tsp vanilla essence
- 3 1/2 cups icing sugar
Palm Tree made with chocolate
- 1/2 cup compound milk or dark chocolate
- 1/2 cup white chocolate or green candy melts
- Candy green colouring oil based
- Palm Tree Template
Palm Tree with Frosting
- 2 tablespoons cocoa powder
- green gel food colouring
- 1 1/2 cup leftover cream cheese frosting
Instructions
- Pre heat oven to 160c and prepare your pans by lining the bottom with baking paper and spraying with cooking oil. I used 2 x 6 inch pans with 3 cups of batter in each (alternatively you could use 2 x 8 inch pans with 3 cups of batter in each or 3 x 8 inch pans with 2 cups of batter in each).
- Pit your dates and roughly chop them, measure out 3 cups after chopping.
- Place you dates, water and bicarb soda in a food processor. Make sure all the dates are covered. Leave dates to steep for 10 minutes.
- While waiting for the dates, beat sugar and butter in a mixer on a medium speed until thick and creamy.
- Process date mixture and add to the butter and sugar.
- Beat till the dates are mixed through.
- Add in eggs and vanilla and mix till incorporated.
- Add in flour and beat until just combined.
- Pour your batter into your prepared pans. Place in the oven and bake for 40 minutes. If you're using 8 inch pans, then check your cakes at the 30 minute mark. Put a skewer or thin knife into the cake and make sure there is no wet batter that sticks to it (you may get cooked crumbs, which is fine).
- Leave your cakes to cool.
Cream Cheese Frosting
- Place the butter and cream cheese into the bowl of your stand mixer.
- Beat until smooth.
- Add in the icing sugar one cup at a time on a low speed.
- This recipe is for a silkier cream cheese frosting, however if you want it more stiffer you can add a 1/2 - 1 cup more of icing sugar.
Palm Tree made with chocolate
- Print the template and tape a piece of baking paper on top.
- Melt your chocolate and white chocolate in the microwave at 20 second intervals, checking each time until it is completely melted. Add in a a little green candy colouring into the white chocolate until the desired colour is reached. If you're using green candy melts, you can skip the food colouring step.
- Fill 2 piping bags, one for each colour.
- Pipe the trunk, skipping a section in between (this will create more defined lines when you come back to pipe them). Pipe the skipped sections.
- Pipe the palm leaf stem, then move from the stem to the edges of the leaf in back and forth motions to create the frongs.
- Make sure that the leaves overlap the trunk and each other or the leaves or the palm will break easily. (if they do, don't worry, just stick them back with more chocolate)
- Leave aside to set.
- Once set, gently slide a flat knife between the chocolate and baking paper.
- Gently pick up the tree and place it on your cake.
Palm Tree made with frosting
- Colour 3/4 cup of your left over icing with green colouring until desired colour is reached.
- Add cocoa to the other 3/4 cup of leftover icing and mix well.
- Fill the chocolate frosting into a piping bag with a 1cm wide round nozzle or cut the tip off the bag.
- Fill the green frosting into a a piping bag fitted with a leaf nozzle.
- Pipe a dot of chocolate frosting onto the base of the cake, use the back of a spoon or pallet knife to drag the dot upwards, continue till just below the top of the cake.
- Hold your green frosting tip at the top of the tree trunk and start piping with a slight side to side motion, this will add some edging to the leaf.
- Continue piping this all around the cake until you have made all the leaves.
- Best served the same or next day, but can be stored in the fridge in an airtight container for 1 week.
Nutrition